
A nursery needs three separate light sources because one fixture cannot handle full-room daytime light, focused task light, and near-dark overnight navigation at the same time. When we set up our daughter’s room, I put in an overhead flush-mount on a dimmer, a small lamp next to the changing table, and a plug-in nightlight by the door. Every one of those layers has a specific job, and skipping one means you end up improvising with a phone flashlight at 2 a.m., which I did more than once before I got the setup right.
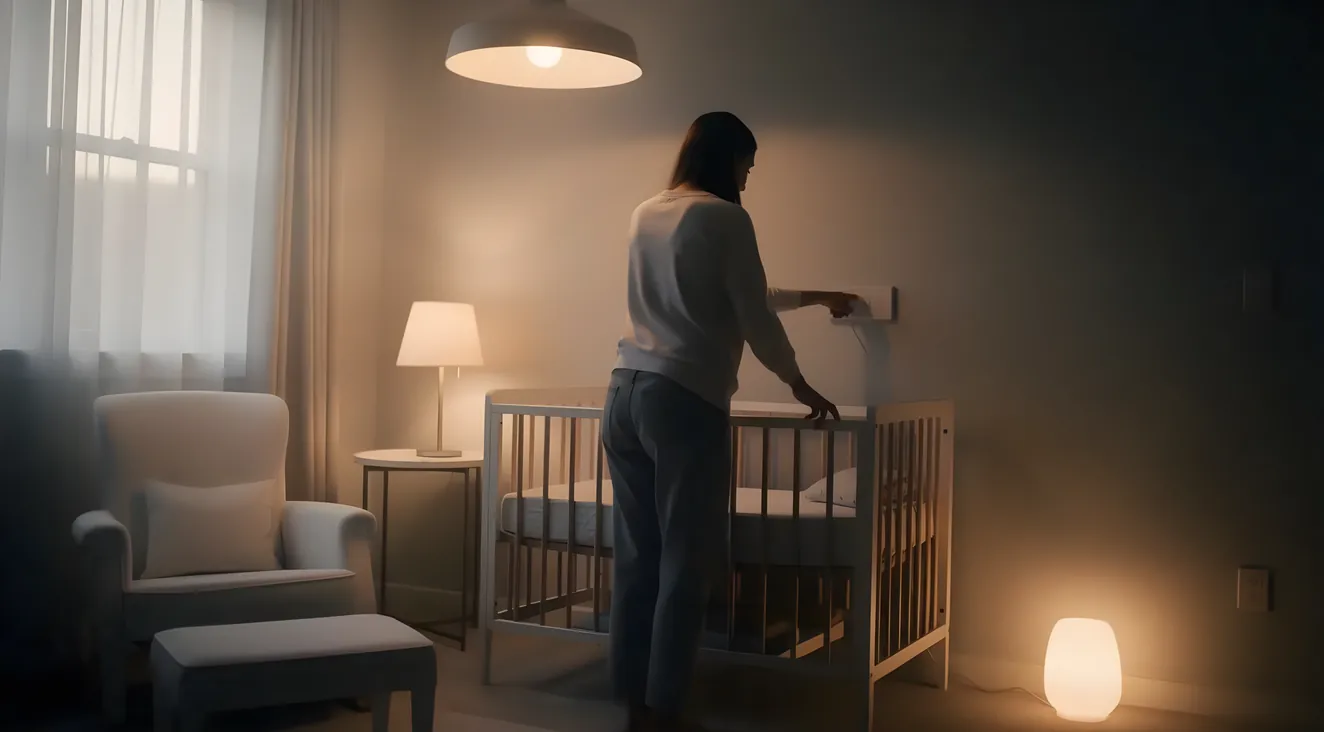
Here is the short version, then I will walk through each piece. Bulbs should run warm, in the 2700K to 3000K range, everywhere in the room. A nursery should be bright enough during the day for changing and play, and dim and warm at night. The single biggest safety issue is cords within reach of the crib. The Consumer Product Safety Commission (CPSC) has documented recalls tied to strangulation and at least one reported child death from lamp cords pulled into a crib.
LED bulbs are the right call for a nursery because they run far cooler than incandescent or halogen, which lowers both burn and fire risk. If you want the full breakdown of how LED bulbs work, that is covered elsewhere. This post is about applying it to a nursery.
The Three-Layer Lighting Plan That Actually Covers a Nursery
A single ceiling fixture cannot do a nursery’s job because daytime brightness and overnight near-dark are opposite requirements. You need enough light at 2 p.m. to spot a diaper rash and enough dark at 2 a.m. to keep a baby drowsy. One bulb, one switch, one brightness level cannot serve both.
I split the room into three layers, each with its own job.
Overhead or ambient lighting handles full-room brightness for daytime tasks and general use. I put in a flush-mount fixture on a dimmer switch, which turned out to be the single best decision in the whole project, because it meant the same fixture could go from full daytime brightness to a low evening glow without buying a second light.
Task lighting covers the specific spots where you actually work: the changing table and the chair where you feed. I clamped a small lamp to the shelf above the changing table, angled so it lit the pad without shining in her eyes.
The nightlight handles overnight navigation, nothing more. Mine is a plug-in unit near the door, low to the outlet, just bright enough to walk the room and check the crib without flipping on anything brighter.
That is the whole plan:
- One overhead fixture, on a dimmer, for daytime brightness and general use
- One task lamp at the changing table or feeding chair, for focused light without flooding the room
- One nightlight, low and warm, for overnight navigation only
Everything else in this post is detail on getting those three right.
Warm Color Temperature: The One Spec That Matters Most
For nursery lighting, warm white bulbs in the 2700K to 3000K range keep the room calm without the blue-leaning glare of daylight bulbs. This is the one spec I would tell anyone to get right before worrying about anything else in the room, including fixture style.
Kelvin measures how warm or cool a light looks, and lower numbers mean warmer, more amber-leaning light. Bulbs sold as “daylight” or “bright white” usually sit at 4000K to 5000K or higher. Those bulbs are designed to feel energizing, which is exactly right for a kitchen or a garage and exactly wrong for a room where you are trying to wind a baby down.
The mechanism behind that is not just a feeling. A peer-reviewed study on preschool-age children found bright evening light suppressed melatonin by roughly 87.6 percent on average, a far bigger effect than the same light produces in adults. Kids are simply more sensitive to blue-leaning light in the evening than grown-ups are, which is exactly the population living in a nursery.
Practically, that means every bulb in the room, overhead, task lamp, and nightlight, should land in that 2700K to 3000K warm-white range. It also means the “bright and blue” bulb you might grab off a shelf out of habit is the wrong pick here even during the day, not just at night.
If you want the full rundown on reading a bulb label, lumens, Kelvin, CRI, dimmable, Energy Star, that is covered in making the switch to LED lighting. This section is just the nursery-specific number: 2700K to 3000K, everywhere in the room.
Quick Reference
Bulb Box Check: Buy This, Skip That
Buy: 2700K-3000K
Labeled "warm white" or "soft white." Use it in every fixture in the room, overhead, task lamp, and nightlight alike.
Skip: 4000K-5000K+
Labeled "daylight" or "bright white." Built to feel energizing, which is the wrong signal in a room meant for winding down.
Overhead and Task Lighting: Fixtures for Daytime and the Changing Table
A flush-mount fixture or a pendant with a diffuser both work fine for overhead nursery lighting. The one placement detail worth thinking through is where the light points. A baby on their back in a crib is looking straight up, so a bright fixture aimed directly down at the crib puts the light right in their eyes. I positioned our flush-mount off to the side of the crib rather than centered above it, which is a small adjustment that costs nothing and avoids the problem entirely.
Task lighting is a separate decision. The changing table needs enough light to actually see what you are doing, especially at odd hours, but it does not need to flood the whole room. I used a small clip lamp on its own pull-chain switch, so I could turn it on for a change without lighting up the whole space and waking anyone up further than necessary. If your feeding chair is in a different spot than the changing table, it is worth giving that its own small light too, on the same logic: enough to see, not enough to broadcast.
A ceiling fan with an integrated light can double as your overhead layer if the room already has one, though I would still put it on a dimmer if the fixture and wiring support it. The goal either way is the same: one strong, controllable light source for daytime and task work, kept off the crib’s direct sightline.
Nightlights: Low, Warm, and Placed for Navigation, Not Ambiance
The standard nighttime recommendation is warm or amber-toned light, not white and not blue-leaning, and that traces directly back to the melatonin mechanism from the color-temperature section above. A nightlight’s whole job is to let you find your way around the room without waking anyone further, so it needs to stay genuinely dim.
Where you put the nightlight matters more than most people expect. I put ours near the changing table and along the path from the door, so I could see well enough to walk in, check on her, or handle a diaper change without needing to flip on the overhead fixture at all. The nightlight is not there to make the room glow. It is there so you are not stubbing your toe or fumbling for a switch at 3 a.m.
I will flag one thing I decided not to use as a hard rule: you will see specific brightness percentages attached to nursery nightlights around the internet, framed as an official recommendation. I could not trace that specific figure back to a real, cited source, so I am not going to repeat it here as fact. The safer, defensible guidance is simpler: keep it low and warm, dim enough that it does not read as room lighting on its own.
If you are shopping for one, look for a plug-in or battery unit that checks three boxes:
- Runs warm or amber, not white
- Sits low near an outlet rather than mounted high
- Puts out a low enough glow that it reads more like a nightlight than a light source you would read a book by
Nursery Lighting Safety: Cords, Outlets, and Bulb Heat
This is the section I spent the most time on, because it is also the one where getting it wrong actually matters. Everything above is about comfort and sleep. This part is about a room a mobile toddler will eventually get into, and about hazards that show up in real incident data, not just decorating advice.
Start with cords. Every cord in the room, lamp cords, baby monitor cords, window-covering cords, needs to be fully out of crib reach, and I mean fully, not “probably far enough.” CPSC recalled children’s wall-mounted lamps in 2013, with the recall expanded in 2014, specifically because cords roughly 7 to 8 feet long were getting pulled into cribs, and at least one child’s death was reported in connection with the hazard.
CPSC’s own guidance is specific here too: secure cords to the wall with a cord-management or adhesive fastener kit instead of letting them hang loose behind or beside furniture. Most advice skips that part. “Keep cords away from the crib” is easy to say and easy to half-do. A fastener kit that physically pins the cord to the wall is the difference between a rule you intend to follow and one that actually holds up when the crib gets rearranged six months later.
Window-covering cords deserve their own mention. CPSC calls corded window coverings one of the top hidden hazards in American homes, and the fix in a nursery is not a clever cord wrap, it is keeping the crib away from any window and its cords entirely. I moved our crib to the wall opposite the window specifically because of this, and it was a five-minute furniture decision that closed off an entire category of risk.
Outlets are the other half of this section. Tamper-resistant receptacles, TRRs, have been required in new residential construction under the National Electrical Code since the 2008 code cycle. If your house or the nursery’s wiring predates 2008, there is a real chance the outlets in that room are not tamper-resistant, which is the practical, date-based reason to add aftermarket outlet covers even if you assume “the house is up to code.” I checked the manufacture date on our house before deciding whether we needed covers, and it settled the question in about two minutes.
The Electrical Safety Foundation International (ESFI), citing CPSC data, reports that roughly 2,400 children a year, about 7 a day, suffer severe shock or burn injuries from sticking objects into electrical receptacles. It is not a rare, freak-accident number. It is the reason TRRs became code in the first place.
Bulb heat is the last piece, and it is one competitors covering this topic tend to skip entirely. Incandescent and halogen bulbs commonly run 200 to 500 degrees Fahrenheit at the surface. LED bulbs run roughly 80 to 100 degrees. That gap matters for two separate reasons: a small hand that touches a hot bulb, and a lamp that tips over near bedding or curtains. LED closes off both risks at once, which is part of why I put LED bulbs in every fixture in the room, not just because they last longer or use less power.
One more practical note on this: a freestanding table lamp is something a mobile toddler can pull over. A wall-mounted or overhead fixture cannot be pulled down the same way. If you have a choice between the two for any given light in a nursery, the overhead or wall-mounted option is the inherently safer failure mode, cord safety and bulb heat aside.
| Bulb type | Typical surface temperature |
|---|---|
| Incandescent / halogen | 200-500°F |
| LED | 80-100°F |
At A Glance
The Nursery Hazard Numbers, In One Place
Lamp Cord Recall
2013, expanded 2014. Cords roughly 7-8 feet long pulled into cribs.
Window Cords
CPSC calls them a top hidden hazard. Fix is distance, not a cord wrap.
Tamper-Resistant Outlets
Required in new construction since the 2008 NEC. Older wiring may lack them.
Shock/Burn Injuries
Roughly 2,400 kids a year, about 7 a day, per ESFI citing CPSC data.
Dimmers and LED Bulbs: Making the Pairing Work
The most common LED-dimmer problem is an LED bulb installed on an old, incandescent-era dimmer switch. The symptoms are easy to spot once you know what to look for: flickering, an audible buzz, or a dimming range that jumps from bright to nearly off with barely any range in between. I ran into exactly this on our first attempt, an LED bulb on a dimmer that had been in the house since before we bought it, and the flicker was bad enough that I assumed the bulb itself was defective.
It was not the bulb. Old dimmers are built around the electrical draw of incandescent bulbs, and LED bulbs draw current differently, which is what causes the flicker and buzz. The fix has two parts: confirm the bulb itself is labeled “dimmable,” since not all LED bulbs are, and confirm the dimmer switch is rated for LED loads specifically, not just “any bulb.” Swapping in an LED-rated dimmer solved the problem completely, and it is a cheap fix relative to how much better the room works with a properly dimmed overhead fixture.
This pairing is worth getting right specifically because the overhead layer in your three-layer plan is doing double duty, full daytime brightness and a low evening setting, and that only works if the dimmer and bulb are actually compatible. For the general framework on choosing LED bulbs, lumens, Kelvin, CRI, dimmable ratings, Energy Star certification, see the full LED buying guide. Here it is just the nursery-specific pairing: dimmable bulb, LED-rated dimmer, both required.
Before You Install
Two Things To Confirm, Not Just One
The Bulb
Confirm it's labeled "dimmable." Not every LED bulb is, and that's a separate spec from the wattage or the Kelvin rating.
The Dimmer
Confirm the switch itself is rated for LED loads. An old incandescent-era dimmer is the actual cause of flicker and buzz, not a defective bulb.
Nursery Lighting Ideas: Common Questions
What is the best type of lighting for a baby room? A layered mix, not one fixture: a dimmable overhead or task light for daytime, plus a low, warm nightlight for overnight. Warm white bulbs, 2700K to 3000K, throughout beat cooler daylight bulbs for a nursery.
What lighting is best for babies? Warm-toned, dimmable light kept low in the evening. Bright, blue-leaning light in the evening is the specific thing to avoid, since it works against sleep-readiness rather than for it.
What color light is calming for babies? Warm white or amber-toned light, roughly 2700K to 3000K. Blue-leaning daylight or bright-white light reads as energizing, not calming, which is the wrong signal for evening and overnight.
Should a nursery be bright or dark? Both, at different times. Give the room plenty of light while you’re changing diapers or playing, then pull it down to something low and warm once evening hits. That daytime-to-nighttime contrast is itself part of what helps a newborn’s circadian rhythm develop over the first few months.
Do I need a dimmer switch in a nursery? Not strictly, but it is one of the best upgrades for the room. A dimmer lets a single overhead fixture cover both full daytime brightness and a low evening setting, instead of installing a second fixture just for the evening.
Are LED bulbs safe for a nursery? Yes. LED bulbs run far cooler at the surface than incandescent or halogen bulbs, which lowers both burn risk and fire risk if a lamp ever tips near bedding or curtains. Just pick a bulb labeled “dimmable” if it is going on a dimmer switch.
Putting the Three Layers Together
If you take one thing from all of this, it is the shopping list: one overhead fixture on a dimmer, one task lamp for the changing table, one warm or amber nightlight, all in the 2700K to 3000K range. That covers daytime brightness, focused task work, and overnight navigation without any one fixture trying to do a job it was not built for.
The one non-negotiable is cords out of crib reach, secured to the wall, not just tucked behind furniture and hoped about.
If you want a concrete next step today, go check two things: pull the box or packaging on your current bulbs and see what Kelvin rating they actually list, and take a look at every cord in the room, lamp, monitor, blinds, and trace where it runs relative to the crib. Both take about five minutes, and both are the kind of check that is easy to put off until it isn’t.