
Mood lighting in a bathroom comes down to one distinction most guides skip: warm, dimmed, indirect light, usually 2700-3000K, layered separately from the bright, closer-to-neutral light you actually need at the mirror to shave or do makeup. I found this out the hard way in my own bathroom, where a single centered overhead fixture was doing all the work and doing none of it well. It was either bright enough to see a straight razor line and too harsh to relax in, or dim enough to feel calm and too dark to trust.
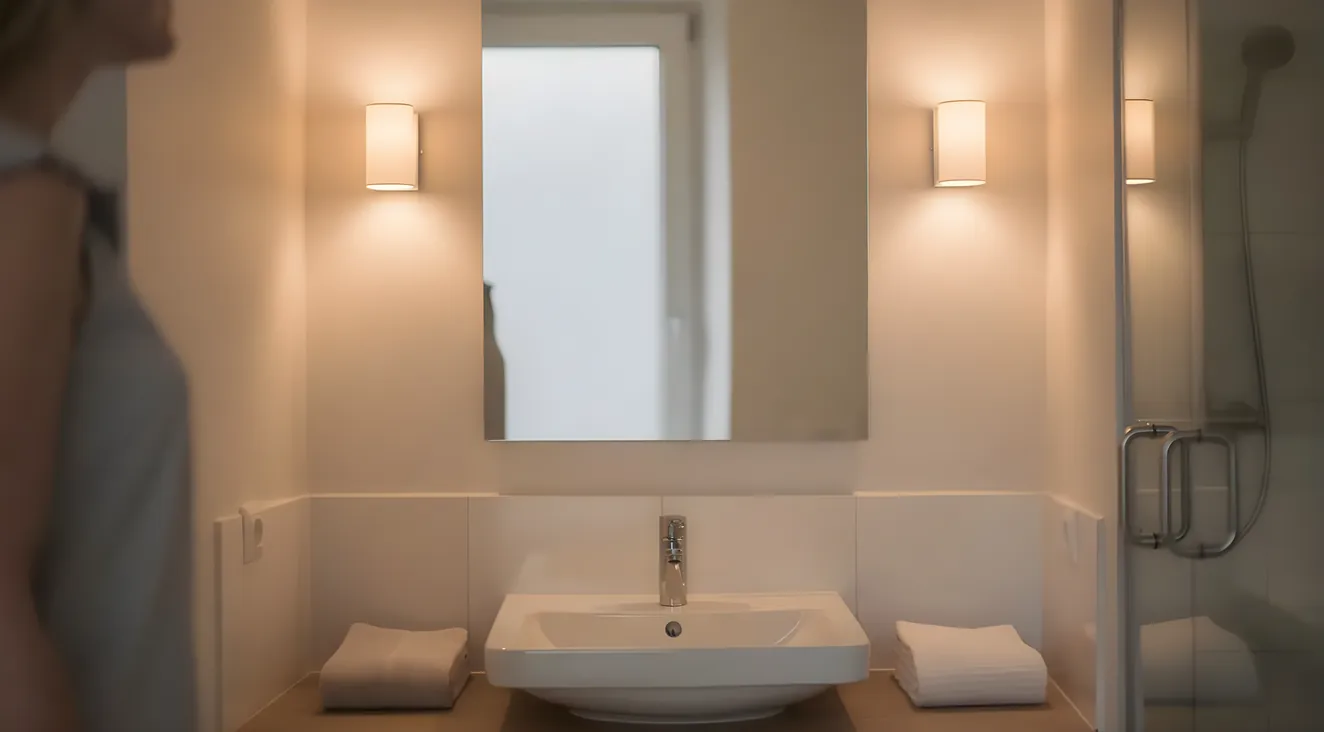
What fixed it wasn’t a fancier fixture. It was splitting the room into layers: ambient light from the ceiling, task light at the mirror, and accent light low in the room, near the tub and along the floor. Four fixture types cover those layers: overhead or recessed cans for ambient, sconces for task, puck lights and floor or toe-kick strips for accent and mood. Color rendering index (CRI) matters too, but only at the mirror, where color accuracy actually counts.
This is what I installed, what Kelvin number I bought for each spot, and where I needed an electrician versus where I didn’t.
The Three Lighting Layers Your Bathroom Actually Needs
Every room needs three separate layers of light, and a bathroom is where skipping this catches up with you fastest. It’s the same ambient/task/accent breakdown kitchen and bath designers use (the National Kitchen and Bath Association teaches it as the standard framework), just applied to a room most of us never think to split up.
Ambient light is the general fill that lets you not walk into the tub at 2 a.m. It comes from the ceiling: an overhead fixture or a few recessed cans. Task light is what you point at a specific job, the mirror, so you can see your face clearly enough to shave a straight line or get eyeliner even. Accent light is the low, decorative layer near the tub, along the floor, or around a mirror frame that makes the room feel calm instead of clinical.
My old bathroom had exactly one fixture doing all three jobs: a single flush-mount can in the center of the ceiling. At full brightness it was harsh enough that nobody wanted to soak in the tub under it. Dimmed down, it dropped so much light at the mirror that shaving by feel became the plan. A single overhead fixture can’t do ambient, task, and accent lighting at once, which is exactly why most builder-basic bathrooms feel either too dim to shave in or too harsh to relax in.
The fix is walking through each of the four fixture types (overhead, sconce, puck, floor) and matching it to the layer it’s good at, instead of asking one fixture to cover all three. It’s the same logic I used lighting my kid’s nursery: different rooms, same three-layer approach, because one fixture trying to do everything shows up anywhere you want both function and mood in the same space.
The Kelvin Range for Mood Lighting (and Why It’s Not the Vanity Number)
Color temperature, measured in Kelvin, is where most bathroom lighting advice quietly gets it wrong. A lot of buying guides give one Kelvin number for “bathroom lighting” and stop there, usually somewhere in the 3500-6500K range. That number is close, but its top end runs hotter than what actually works for task lighting at the mirror. It’s the wrong number for the mood layer, and using it everywhere is exactly why builder-basic bathrooms feel like a dressing room at a big-box store instead of somewhere you’d want to sit in a tub.
For mood and accent lighting, the range that actually reads as warm and relaxing is 2700-3000K. ENERGY STAR’s own color guide puts the warm end of the range at 2200-3000K. That’s a wider official bucket than the practical range I’d actually buy from; the sweet spot stays at 2700-3000K. Below 2700K starts to look orange under most fixtures; above 3000K starts to look more like daylight than candlelight. I bought 2700K bulbs for my floor strip and puck lights and 3000K for one sconce pair that does double duty, and the difference between those two ends of the range is noticeable even though it’s only 300K apart.
Task and vanity lighting at the mirror wants a different number: 3500-5000K, closer to neutral or daylight white, because that’s the range that renders skin tone and detail accurately enough to see what you’re doing. This is the number most “bathroom lighting” guides are really describing when they say 3500K and up, without saying that it’s only right for one part of the room.
So the honest answer to “what Kelvin should I buy for bathroom mood lighting” has two parts, not one: 2700-3000K for anything near the tub, the floor, or a mirror frame you want glowing instead of glaring, and 3500-5000K reserved for the fixture actually pointed at your face. Buying one bulb temperature for the whole room is the single most common mistake I see in bathroom lighting, and it’s an easy one to fix because it doesn’t require rewiring anything, just buying the right bulb for each fixture.
Overhead, Puck, Sconce, and Floor Lighting: What Each One Is For
These four fixture types are where most bathroom lighting ideas start: here’s how each one maps to a layer, with the specs I used.
Any fixture within a few feet of the tub or shower needs a wet rating
NEC 410.10(D) covers this: a recessed or overhead fixture inside the wet-location zone needs at minimum a damp rating, wet rating if it sits directly over the spray. Check the fixture's rating before you buy, not after it's mounted.
Overhead and recessed cans (ambient layer). This is your ceiling fill light, aimed at general visibility, not mood or task. A rough starting point for overall bathroom brightness is 50-80 lumens per square foot, and recessed can spacing follows a simple rule of thumb: divide your ceiling height in feet by two to get roughly how many feet apart to space the cans. Any recessed or overhead fixture within a few feet of a tub or shower falls inside the wet-location zone under NEC 410.10(D), and needs at minimum a damp rating, wet rating if it’s directly over the spray. This one is new-wiring or new-can territory, which for most homeowners means an electrician, unless you’re swapping an existing fixture on an existing box.
Sconces (task layer). This is what fixes the shadow-under-the-chin problem a single overhead light causes. Mount sconces at eye level, roughly 60-70 inches above the finished floor. If you’re using a flanking pair on either side of the mirror, space them 28-40 inches apart, with 36-40 inches being the more common comfortable spacing. If you’re using a single sconce above the mirror instead of a pair, mount it around 75-80 inches above the finished floor. Cross-lighting from the sides, not down from above, is what eliminates the shadows that make a single overhead can-light feel unflattering. Sconces are hardwired, so this is an electrician job unless you’re doing a like-for-like swap on an existing sconce box.
Puck lights (accent and task, low-profile). These are small, low-voltage lights, typically 12V DC, that run from about 1 watt and 75 lumens on the mini end up to around 4 watts and 300-375 lumens on the brighter end. They’re commonly available in 3000K warm white. Puck lights are also the easiest fixture on this list to add without an electrician, since a lot of kits are plug-in or battery-powered and mount with adhesive pads, which matters if you’re a renter (more on that shortly).
Floor and toe-kick lighting (accent and safety layer). This is one of the simplest forms of bathroom accent lighting: LED strip lighting run along the floor, under a vanity, or at toe-kick height, specified per linear foot rather than per fixture. For a dim night-glow effect, 75-150 lumens per foot is enough. For a brighter accent look, 150-250 lumens per foot reads more intentional. It’s commonly available in 3000K warm white, and IP65 is the practical minimum rating once it’s living at floor level in a room with a shower running. Like puck lights, most floor strips are adhesive-mount and plug-in, no electrician required.
| Fixture | Layer | Kelvin | Output | Mount height / spacing |
|---|---|---|---|---|
| Overhead/recessed | Ambient | 3000-5000K | 50-80 lm/sq ft (overall room) | Ceiling height (ft) ÷ 2 = can spacing |
| Sconce | Task | 3500-5000K | Varies by fixture | 60-70 in. AFF, 28-40 in. apart, or 75-80 in. AFF if single |
| Puck light | Accent/task | 3000K | 75-375 lumens | Under cabinets, mirror frame, low-profile |
| Floor/toe-kick | Accent/safety | 3000K | 75-250 lm/ft | Floor level, toe-kick, along baseboards |
Two of the four, puck and floor, are the ones that don’t need an electrician, which is exactly the pair worth knowing about if rewiring isn’t on the table.
CRI and Why the Mirror Needs a Different Number Than the Tub
CRI, or color rendering index, measures how accurately a light source shows true color compared to natural daylight, on a scale that tops out at 100. At the mirror, this matters: a low-CRI bulb can make skin tone look off, make it hard to judge a shave line, or throw makeup application off enough that it looks different once you’re outside under real light. For bathroom vanity lighting specifically, I’d put CRI 90 or higher as the number worth buying for any bulb going into a vanity or sconce fixture.
At the tub, the floor strip, or anywhere else in the accent layer, CRI matters a lot less. Warmth and dimming range do more of the work than color accuracy when the point of the light is to feel calm, not to judge whether your razor line is straight. I didn’t spend extra on high-CRI bulbs for my floor lighting, and it hasn’t cost me anything, because nobody’s checking their skin tone against ambient toe-kick glow.
One number worth knowing if you’re buying a serious vanity fixture: R9. Standard CRI is an average across eight pastel test colors, and it can miss poor red rendering specifically, which matters more than it sounds like it should, because skin tone leans heavily on red. A bulb can post a CRI 90+ rating and still render reds poorly if its R9 score is low. R9 of 50 or higher is the number to look for if you want to be thorough, though it’s not something every reader needs to hunt down. CRI 90+ at the mirror is the number that matters for almost everyone; R9 is the detail for anyone buying a fixture they actually care about.
What to check on the box before you buy a vanity bulb
Any mirror or vanity fixture
CRI 90 or higher
A fixture you're being picky about
Also check R9 of 50 or higher
Why New LED Bulbs Flicker on an Old Dimmer
LED flicker is the single most common complaint I hear about bathroom lighting, and it almost always traces back to one mismatch: a dimmable LED bulb paired with a dimmer switch that was never built for LED in the first place.
Older dimmers, the leading-edge or TRIAC type, were designed for incandescent bulbs, which draw power in a way LED drivers don’t replicate. Put a dimmable LED on a leading-edge dimmer and you’ll get flicker, buzzing, or a dimming range that jumps instead of fading smoothly. Trailing-edge dimmers, sometimes labeled MOSFET, are built for the waveform LED drivers actually produce, and swapping to one is the fix in most cases. It’s a straightforward switch-for-switch replacement, not a rewiring job, though it does mean working inside an electrical box, so if that’s not something you’re comfortable with, it’s a short job for an electrician.
There’s a second, separate cause worth knowing: minimum load. Dimmers built for incandescent bulbs typically have a minimum load floor, often somewhere around 20-40 watts, below which they can’t dim properly. A handful of low-wattage LED bulbs together, especially small puck lights, can fall under that floor even on a dimmer that’s otherwise LED-compatible, and flicker as a result. The fix there is either a dimmer rated for a lower minimum load, or adding enough LED wattage on the circuit to clear the floor.
If you haven’t already sorted out lumens versus watts and what “dimmable” means on the box, how to actually read an LED bulb’s specs is worth reading once so I don’t have to repeat all of it here. What matters for this specific dimmer problem is narrower: check whether your dimmer is rated for LED at all, and check the bulb wattage against the dimmer’s minimum load, before assuming the bulb itself is defective.
Before you blame the bulb, check the dimmer for two things
Dimmer type
Leading-edge/TRIAC dimmers weren't built for LED. Trailing-edge (MOSFET) is the fix.
Minimum load
Most dimmers need roughly 20-40 watts to dim properly. A few low-watt pucks together can fall under that floor.
No Rewiring? What You Can Actually Do
Puck lights and floor or toe-kick strips, the two fixture types already covered here, are also the two that don’t require touching your home’s wiring at all, which makes them the answer for anyone renting, working around an HOA, or just not ready to open up a wall. Adhesive-mount puck lights and LED strips run on plug-in power or batteries, and most stick on with a mounting pad strong enough to hold in a bathroom without falling off.
That covers the mood and accent layer, which is honestly the layer that does the most for how a bathroom feels at night. You’re not going to rewire an overhead fixture as a renter, but you can add a warm 2700K floor strip under the vanity or a puck light behind the mirror frame and get most of the mood-lighting effect without an electrician anywhere near the job.
A couple of other no-wiring options worth a mention: rechargeable battery pucks that don’t need an outlet nearby, and smart bulbs that screw into an existing overhead socket and let you dim and warm the color temperature from an app, no new dimmer switch required. Battery pucks, smart bulbs, adhesive strips: all three get you real mood lighting without an electrician, no matter what your lease or your walls allow.
Mood lighting with zero electrical work
Adhesive puck lights
Stick-on, plug-in or battery, 2700K
Floor/toe-kick strips
Adhesive-mount, IP65 minimum, 2700K
Smart bulbs
Screw into an existing socket, dim and warm from an app
Putting the Four Layers Together
What I ended up with is four fixtures doing four separate jobs instead of one fixture doing all of them badly: recessed cans on the ceiling for ambient light, a flanking pair of sconces at 3500K beside the mirror for task light with CRI 90+ so I can actually see a shave line, a 2700K puck light behind the mirror frame, and a 2700K floor strip along the base of the tub surround for the mood layer.
The sconces and the floor strip don’t run off the same switch, and that separation turned out to matter more than I expected. Bright morning light at the mirror and warm, dim tub-side glow at night are two different circuits doing two different jobs, not one dimmer trying to be both.
If there’s one number to remember out of all of this, it’s the two-Kelvin-range rule: 2700-3000K wherever you want the room to feel calm, 3500-5000K wherever you’re actually pointing light at your face. I write up projects like this one on this site as I finish them, mostly so I remember the numbers myself the next time a bulb burns out and I have to buy a replacement without guessing.
FAQ Section
How do you create mood lighting in a bathroom?
Add a warm, dimmable light source, 2700-3000K, that runs on its own switch or plug separate from your main overhead fixture. A floor strip or puck light near the tub does this without any rewiring.
What type of lighting is most flattering for a bathroom?
A pair of sconces flanking the mirror at eye height, rated CRI 90 or better. Side lighting eliminates the shadows a single overhead fixture throws across your face, and the higher CRI keeps skin tone looking accurate instead of washed out.
What are common bathroom lighting mistakes?
Expecting one overhead fixture to handle ambient, task, and mood lighting at once; buying the same Kelvin bulb for the whole room instead of warming up the tub and floor separately from the mirror; and putting a dimmable LED on a dimmer switch that was never rated for LED to begin with.
What type of lighting is best for a bathroom?
It depends on which job the fixture is doing. Recessed or overhead lighting covers general ambient light, sconces handle task lighting at the mirror, and puck or floor lighting covers the mood and nighttime-safety layer. No single fixture type covers all three.