
Fixing a garbage disposal almost always comes down to one of three jobs: freeing a jammed impeller plate, resetting a tripped overload protector, or resealing a leak at one of four specific points under the sink. None of that requires a plumber, and none of it requires replacing the unit, as long as you know which of the three you’re actually dealing with.
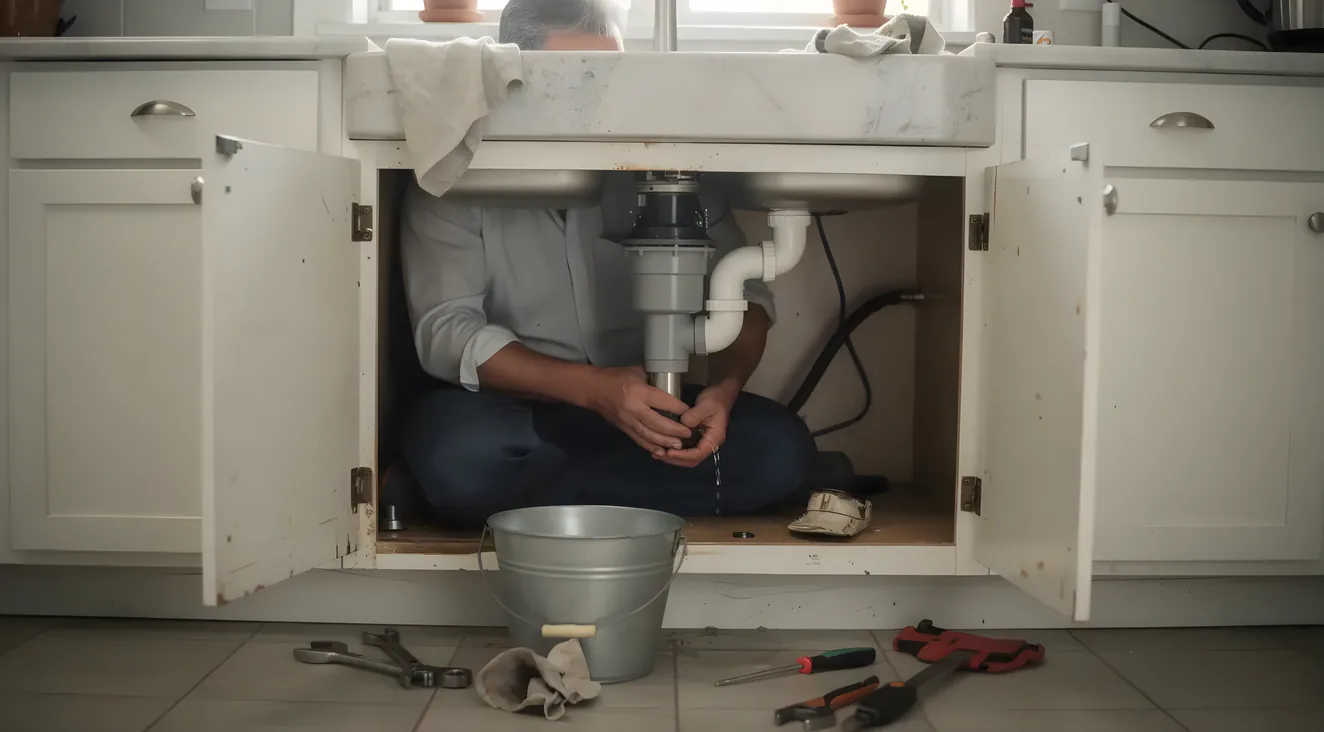
The impeller plate does the grinding by flinging food against a stationary ring, not by cutting with blades, which is why a jam almost never means something is broken. The red reset button on the bottom of the unit gets mistaken for a power switch too. Press it before the motor has cooled and nothing happens, for reasons the next section covers in full. Leaks trace back to one of four spots: the sink flange up top, the dishwasher inlet on the side, the P-trap connection at the bottom of the drain line, or the sealed motor housing itself, and three of those four are DIY jobs with basic tools and a tube of plumber’s putty. The fourth, a leak from the housing itself, means the internal seal has failed and the unit is done.
This post assumes you already know it’s a repair job, not a mystery symptom. If you’re still not sure what’s wrong with yours, go diagnose the symptom first before working through any of the steps below. What follows here is the full procedure: every tool, every fastener size, and the complete P-trap disassembly and reassembly that most guides stop short of finishing.
Before You Touch Anything: Cut the Power
Before you put a hand anywhere near the grind chamber, kill the power. Most residential disposals are corded, so the fastest way is to unplug the unit under the sink rather than relying on the wall switch, which only controls the motor circuit and can still leave the unit live if the switch itself is faulty. If yours is hardwired instead of plugged in, cut the breaker at the panel and confirm it’s off by trying the switch.
A disposal on a GFCI-protected circuit will sometimes trip that outlet instead of tripping its own internal reset, so if the unit seems completely dead, check the GFCI reset button on the outlet, or a nearby one on the same circuit, before assuming the disposal itself has failed.
Never put your fingers or a hand inside the grind chamber, even with the power confirmed off. Use tongs to fish out anything you need to remove. This is the one step that applies to every procedure below. I won’t repeat the full explanation each time, but treat “power off” as step zero before every fix in this post.
What You'll Actually Reach For
Every tool this repair calls for, grouped by the job it does. Nothing here needs a hardware store run beyond plumber's putty if you don't already have it on hand.
Freeing a jam
1/4-inch hex or jam-buster wrench, tongs
Resealing a connection
Plumber's putty, putty knife, channel-lock pliers, basin wrench for tight clearance
Finding the source
Flashlight, dry paper towels, bottle brush, a bucket for standing water
Freeing a Jammed Impeller Plate With a Hex Key
Most people call them blades. They’re not. A garbage disposal grinds with a flat impeller plate that has two blunt lugs mounted on it, spinning fast enough to fling food waste against a stationary grind ring lining the chamber wall. There’s nothing sharp to dull and nothing to sharpen, which is also why a jam is almost always a mechanical obstruction, not a broken cutting edge.
Here’s the diagnostic tell: a disposal that hums but won’t spin almost always means the impeller plate is jammed against the grind ring, not that the motor has failed. Power is reaching the motor fine, and the fix is a hex key worked through the jam socket, not a new unit. If you flip the switch and get nothing at all, no hum, no sound, that’s a different problem, covered in the next section.
With the power off, find the hex socket on the underside of the unit, centered on the bottom. Insert a jam-buster wrench (InSinkErator ships one with most of its disposals) or a standard 1/4-inch hex or Allen wrench if the original is long gone. Work the wrench back and forth through a full rotation. You should feel it catch and then break free as the plate clears whatever’s wedged against the grind ring. InSinkErator’s own jam-clearing procedure walks through this same socket-and-wrench method: support.insinkerator.com/app/answers/detail/a_id/515.
Once the plate turns freely through a full rotation with the wrench, pull the wrench out. Still with the power off, reach in with tongs, never your fingers, and pull out whatever caused the jam. A bottle cap, a bone fragment, and a wedged piece of celery are the three most common culprits I’ve dug out of my own unit.
Restore power, run cold water into the drain, and give the switch a brief press. If the plate spins freely and the water drains normally, you’re done. If it still won’t turn, work the hex wrench through a few more rotations before trying power again. Don’t force it repeatedly against resistance. If two or three passes with the wrench don’t free it, something may be jammed further down than the wrench can reach.
The Reset Button Isn’t an On/Off Switch
The red square button on the bottom of the unit gets treated like a power switch more often than it should be. It isn’t one. It’s a thermal overload protector, a safety device that trips when the motor overheats or pulls more current than it should, cutting power to protect the motor from burning out. You’ll usually be able to see it: when it trips, it visibly pops out, dropping about a quarter inch from its resting position.
To reset it, press it back in firmly until it clicks. If it won’t stay in, or it pops back out the moment you let go, the motor hasn’t cooled down enough yet. Cut power at the wall switch or the breaker and give it up to 10 minutes to cool before trying again. InSinkErator’s own reset guidance covers this same cool-down-and-reset sequence: support.insinkerator.com/app/answers/detail/a_id/516.
If the button won’t hold after a full cool-down, or it trips again within minutes of every reset, that’s past what a reset can fix. It usually means the motor is still drawing an overload, or developing a deeper fault, not that you’re doing the reset wrong. That pattern is one of the signals covered later in the repair-vs-replace section.
Two Patterns Worth Remembering
Keep an eye out for both of these as you work through this unit, because they point the same direction: a button that won't stay in after a real cool-down, and one that trips again within minutes of every single reset. Neither is a sign you're resetting it wrong. Both are the motor telling you it's overloaded or developing a deeper fault, which is the signal worth weighing against a full replacement later in this post.
Finding a Hidden Leak Before You Take Anything Apart
Before you disassemble anything, it’s worth knowing which of the four leak points you’re actually dealing with, so you don’t take apart a P-trap when the problem was the flange the whole time. Here’s where each one shows up and what fixes it, top to bottom:
| Leak Point | Where It Shows Up | The Fix |
|---|---|---|
| Sink flange | Continuous drip from the top, where the disposal meets the sink | Scrape old putty and reseal with fresh plumber’s putty |
| Dishwasher inlet | Only during a dishwasher drain cycle, not continuously | Tighten the hose clamp; replace the hose if the leak persists |
| P-trap connection | At the discharge outlet, below the sink | Disassemble, clean, and reseat the slip nuts |
| Motor housing (sealed) | Bottom of the unit, around the reset button | Replace the unit; not a field repair |
To find which one you’re actually dealing with, plug the sink drain and fill the basin three or four inches with water. Pull the plug and watch with a flashlight for exactly where the first drip appears as the water drains past. If the leak is slow enough that the flashlight test doesn’t catch it right away, lay a dry paper towel under each suspect joint and check back in a few minutes. The towel will show a wet spot at the source even when the leak itself is too slow to see by eye.
Resealing a Leaking Flange
The flange is the metal collar sitting in the sink drain opening that the disposal mounts to from underneath. When it leaks, it’s almost always one of two things: the ring of plumber’s putty that originally sealed it against the sink has dried out and shrunk, or the mounting screws holding the assembly together have loosened over time and let the seal shift.
Fixing it means fully separating the disposal from the flange, not just tightening what’s visible from below. Start by disconnecting the drain line and dishwasher hose from the unit (a bucket underneath catches any residual water), then twist the disposal to release it from the mounting ring and lower it out. With the unit out of the way, loosen the mounting bolts holding the flange assembly to the underside of the sink, then lift the whole flange out from the top of the sink.
Scrape every bit of the old putty off the flange and off the sink opening itself with a putty knife, and wipe both surfaces clean. Take about a half inch of fresh plumber’s putty and roll it into a rope, then wrap it around the underside lip of the flange before setting it back into the sink opening. Push down until it seats evenly, then work from below: reinstall the mounting bolts and snug them down, snug meaning firm and even, not wrench-tight, since overtightening here can crack the mounting ring or squeeze the putty out unevenly. Wipe away any putty that oozes out around the edge.
Reinstall the disposal onto the mounting ring, reconnect the drain line and dishwasher hose, restore power, and run water while watching the flange from below for drips. InSinkErator’s mounting and flange spec confirms this same reseal sequence: support.insinkerator.com/app/answers/detail/a_id/577.
The Dishwasher Inlet Leak
The dishwasher inlet is the side port on the disposal, a knockout that gets punched out during installation so the dishwasher’s drain hose can clamp onto it. A leak here has a tell you won’t get from the other three leak points: it only shows up while the dishwasher is actively draining, not continuously like a flange or P-trap leak.
The fix starts simple. With the power off, check the hose clamp at the connection and tighten the screw. That alone solves most dishwasher inlet leaks, since the clamp loosens gradually with vibration over years of dishwasher cycles.
If tightening the clamp doesn’t stop it, run the dishwasher through a cycle and watch the connection closely. InSinkErator’s dishwasher inlet documentation confirms the clamp check above: support.insinkerator.com/app/answers/detail/a_id/525. If the clamp is fully tight and it’s still leaking, the hose itself has likely cracked or worn through and needs replacing.
Taking Apart and Reassembling the P-Trap
This is the job neither of the two national how-to guides I checked before writing this actually finishes. Both walk you through loosening the drain-line connections, and then stop, either because the leak turned out to be somewhere else or because they just don’t cover putting it back together. Here’s the full loop, start to finish.
The P-trap is the U-shaped fitting under the sink that connects the disposal’s discharge outlet to the wall drain stub-out. You need to get into it for two reasons: a leak at the discharge connection itself, or a clog sitting inside the bend that’s downstream of anything the disposal can reach.
Disassembly
Put a bucket directly under the trap before you touch anything. It’s going to hold standing water. Look for two slip nuts: one where the trap connects to the disposal’s discharge pipe, one where it connects to the wall drain stub-out. Loosen both by hand if you can, or with channel-lock pliers if they’re stuck. If clearance under your sink is too tight for pliers to get a grip, a basin wrench reaches into that tight space where a regular wrench can’t. Once both nuts are loose, the trap drops free and drains into the bucket.
Inspection
With the trap off, look inside the bend for buildup. Grease, coffee grounds, and general gunk tend to collect right at the curve. Rinse it out under a faucet, and for anything stuck to the walls, a bottle brush gets into the bend better than just running water through it.
Reassembly and Test
Reseat the trap against both the disposal outlet and the wall stub-out. Check that the beveled edge of each slip-nut washer faces into the trap bend, not away from it. That orientation is what actually forms the seal. Thread each slip nut on by hand until it’s snug, then add a small additional turn with pliers, no more. This is the step I got wrong the first time I did this: I cranked the nuts down hard because tighter felt safer, and ended up cracking one of the plastic nuts and creating a leak that hadn’t existed before I started. Snug plus a small turn is enough. Overtightening here is the single most common way people create the exact leak they were trying to fix.
Once both nuts are tightened, run the faucet fully open for a minute or two and watch both slip-nut joints closely. A dry paper towel laid under each joint will show even a slow drip you’d otherwise miss. If both stay dry under a full minute of running water, the job’s done.
Snug, Not Tight: The Rule for Every Fastener Under the Sink
The flange's mounting bolts and the P-trap's slip nuts share the exact same rule: hand-tight, then a small final turn with a tool. That's the whole standard, on both ends of this job. Cranking either one down further "to be safe" is the single most common way this repair creates the leak it was supposed to fix, whether that means a cracked mounting ring or a split slip nut.
When It’s Repair and When It’s Replace
There’s one leak point this post doesn’t walk through fixing: a leak from the sealed motor housing itself, showing up at the bottom of the unit around the reset button rather than at any of the three connection points above. That’s not a seal you can access or replace in the field. It means either the motor shaft seal inside the housing has failed or the shell itself has developed a crack, and both sit inside a sealed assembly that was never designed to be opened and resealed by hand. That access simply doesn’t exist, and that’s the real reason a bottom-housing leak means replace rather than a rule someone made up. The failure point is physically inaccessible without cracking open a unit that was never meant to be serviced that way.
A few other signals point toward replace regardless of what a repair would cost: a motor that hums or stays completely silent through every diagnostic step above, jams that keep recurring on an older unit no matter how many times you clear them, or an odor that survives a real cleaning rather than fading. As a rough gut check, if a repair would cost more than about half of what a new unit plus installation would run, replacing is usually the better use of the money.
If you’ve landed on replace, the actual swap, disconnecting the old unit and mounting the new one, is covered in installing a new one. If you haven’t picked a unit yet, picking a replacement unit covers what to look for.
FAQ
What’s the easiest way to fix a garbage disposal?
Nine times out of ten it’s the jam. Grab a 1/4-inch hex wrench, find the socket on the bottom center of the unit, and work it through a full turn until the plate spins free. Follow up with tongs to clear whatever caused it. The whole thing takes under 15 minutes and you won’t need to buy a single part.
Can you fix a garbage disposal leak yourself, or does it always need a plumber?
Three out of the four leak spots are well within reach of an average toolbox: the flange up top, the dishwasher hose clamp on the side, and the P-trap connection down below. Putty, a wrench, and patience get you through all three. The only one that’s off limits is a leak from the sealed housing itself, and that’s a replacement, not a repair.
How do you know if a leak is from the flange or the P-trap?
Fill the sink a few inches, pull the plug, and follow the water down with a flashlight. The flange sits right at the top where the disposal meets the sink drain. The P-trap connection is well below that, down at the U-bend where the discharge pipe meets the wall drain. Whichever one drips first as the water passes through is your source.
Why does the reset button keep tripping every time I press it?
If it won’t hold after you’ve given the motor a real cool-down, up to 10 minutes with the power cut, the motor is telling you it’s still overloaded or developing something worse, not that you did the reset wrong. A button that pops right back out within minutes of every single reset is a sign to stop resetting it and start thinking seriously about whether the unit is done for.