
Whether this is a straightforward afternoon or a job for an electrician comes down to three things: is there already a switched outlet or hardwired switch under the sink, does the new unit’s mounting system match the old one, and is a dishwasher involved. Get all three right and you’re looking at a job Family Handyman clocks at 1 to 2 hours with basic tools. The mechanical sequence is the same every time: seat the sink flange, stack the mounting ring assembly, wire the disposal, hang the unit, hook up the drain, test for leaks.
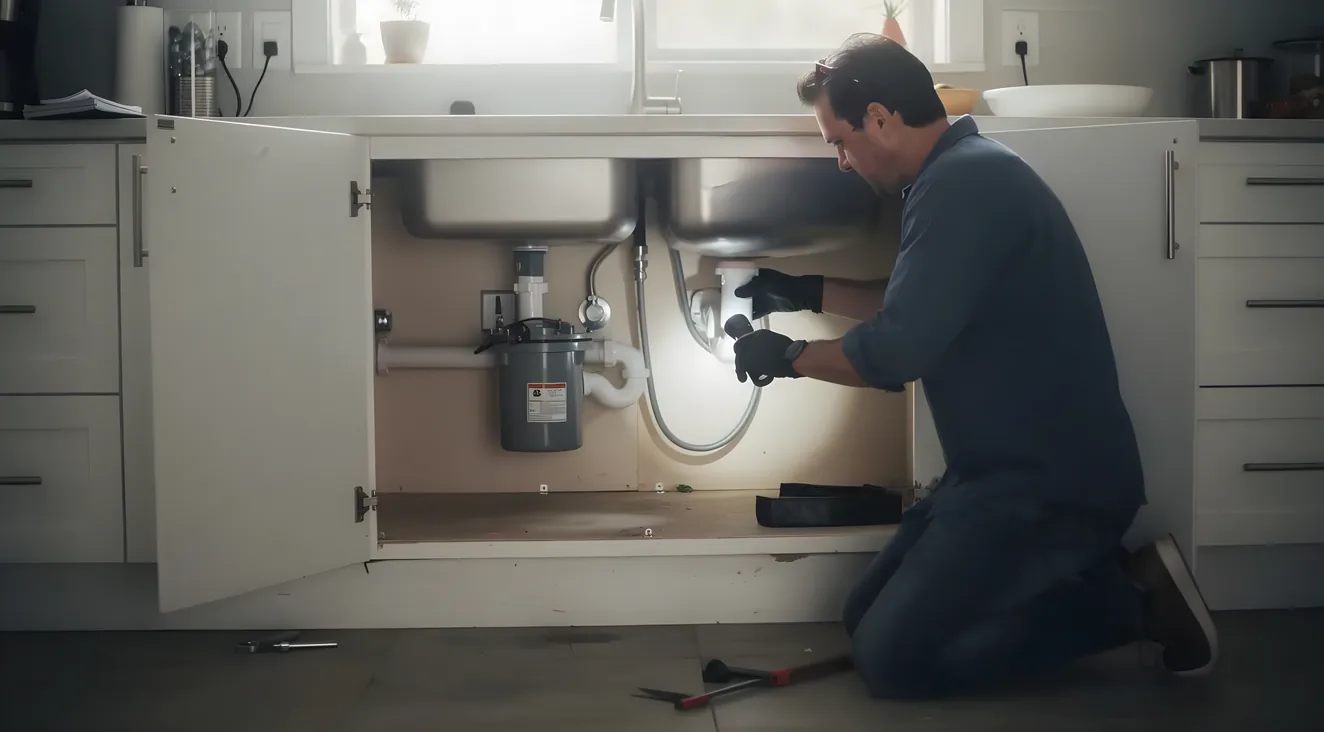
The step that trips up more first-timers than anything else is the dishwasher knockout plug: leave it in place when a dishwasher’s connected and the dishwasher will run its full cycle and never drain a drop. And if there’s no existing outlet or dedicated circuit under that sink, stop: missing switched-outlet or dedicated-circuit wiring means new electrical work, not a disposal swap, and that’s where a licensed electrician takes over.
I’ve done this job twice now, once as a straight swap and once putting a disposal into a sink that never had one. Below is exactly how it goes, in the order it actually happens, including the parts nobody’s manual bothers to warn you about.
The 5-Minute Check: Is This a DIY Weekend or a Call-an-Electrician Job?
Before you buy anything, answer three questions. I do this standing at the sink with the cabinet doors open.
- Is there already a switched outlet or a hardwired switch under the sink? If the old disposal was plugged into an outlet, or wired directly to a wall switch, that circuit, GFCI-protected or not depending on your local code, is already there and you’re just reconnecting to it.
- Is the new disposal the same mounting family as the old one? InSinkErator’s twist-lock system (they call it Quick Lock) and the older three-bolt mounting style aren’t interchangeable without swapping the whole flange assembly. Waste King units and InSinkErator units, for example, don’t share a mount, so a straight brand swap without checking this first is a common mistake.
- Is a dishwasher already hooked up, or not part of the picture at all? Either answer is fine. It’s the in-between, forgetting the dishwasher’s there, that causes problems.
If all three land on “yes, and it matches,” you’re in easy territory: 1 to 2 hours, a wrench and a screwdriver, no new wiring. Cross-brand or cross-mount swap adds maybe 20 to 30 minutes, because you’re removing the old flange completely and resealing a new one, but it’s still a DIY job.
If there’s no existing switched outlet or dedicated circuit, that’s where I’d stop. Professional electricians who discuss this regularly (Mike Holt’s Code Forum is a good read if you want the actual back-and-forth) are consistent on this point: running new circuit wiring into a wet under-sink location isn’t a “figure it out with a multimeter” project. That’s the line between a disposal swap and an electrical job.
Worth knowing before you buy the unit: a professional install runs about $550 on average, with a typical range of $150 to $950 depending on the job, per Angi’s 2026 cost data. Homewyse puts a full install closer to $493 to $578, which lines up with Angi’s range. That’s the real comparison: an afternoon of your own time against a few hundred dollars, once the wiring’s already in place.
If you haven’t picked a unit yet, it’s worth taking a few minutes to compare current disposal models before you buy rather than grabbing whatever’s cheapest on the shelf. And if what you actually have is an old unit that’s leaking, jammed, or tripping the breaker rather than nothing at all, it might be worth reading the full repair walkthrough first. Sometimes the fix is smaller than a full replacement.
| Situation | What it means |
|---|---|
| Existing switched outlet/circuit + matching mount + dishwasher status is clear | Easy weekend job, 1 to 2 hours |
| Existing outlet/circuit, but different mount than the old unit | Still DIY, add 20-30 minutes for a full flange swap |
| No existing switched outlet or dedicated circuit | Electrician territory, new wiring required |
Electrical Safety Checkpoint
No switched outlet or circuit?
Stop. That's new electrical work, not a disposal swap, and it needs a licensed electrician.
Running new circuit wiring?
Check with your local building department first. Plenty of jurisdictions require a permit for that work, even for one outlet.
Tools and Materials to Have Ready
I lay everything out on the counter before I start. Nothing kills momentum faster than digging through the garage with your hands wet.
Tools: - Adjustable wrench - Flathead and Phillips screwdrivers - Hex/Allen key, or a hammer and a wooden dowel for the knockout plug - Channel-lock pliers - A bucket (there’s always some water left in the trap)
Materials: - Plumber’s putty or a rubber gasket, whichever the manufacturer’s install sheet calls for. Don’t assume putty just because that’s what the last one used. - Wire nuts, if the disposal isn’t pre-corded - Teflon tape for threaded drain joints - A dishwasher connector kit, only if the new hose diameter doesn’t match what’s already there
One thing worth knowing before you open the box: twist-lock hardware like InSinkErator’s Quick Lock is built around a rubber gasket seal, not putty. And plumber’s putty can leave a stain on some stone sink materials over time if it sits too long. Check the install sheet for your specific unit rather than defaulting to whatever’s in the junk drawer.
Quick aside on unit types, since it comes up while you’re shopping: continuous feed units run while the switch is on and you feed waste in as you go, batch feed units only run once you drop the stopper in place. That decision belongs to the buying guide, not here, but it’s worth knowing the terms before you’re standing in the aisle.
Removing the Old Disposal (Skip This If You’ve Never Had One)
If this sink has never had a disposal, skip ahead to the flange-and-mount steps below. If you’re replacing one, here’s the order:
- Kill power at the breaker, not just the wall switch. A switch can be wired wrong or fail in the “off” position and still leave the circuit live. The breaker is the only cutoff I trust with my hands inside the grinding chamber.
- Set a bucket under the trap and disconnect the P-trap and discharge tube. There’s always a cup or two of standing water in there, and it goes straight down onto whatever’s in the cabinet if you’re not ready for it.
- Disconnect the dishwasher hose, if one’s attached to the old unit.
- Release the old unit from the mounting ring. Twist-lock systems come off with a counterclockwise turn of the lower ring. Three-bolt systems need all three screws backed out evenly, not one at a time to full loosening.
- Scrape the flange area clean. Old plumber’s putty or gasket residue left behind is the number one reason a new flange won’t seal properly. Get it down to bare metal before you move on.
Installing the New Disposal: Flange, Mount, Wire, Hang
This is the part that matters most, so take your time here rather than rushing to get the unit hung.
Dishwasher connected? Handle this before you hang the unit
If a dishwasher hooks up to this disposal, remove the factory knockout plug before you mount the unit, not after. See the dishwasher knockout plug section below for exactly how.
- Seat the new sink flange from above. Roll the plumber’s putty into a rope and press it around the underside of the flange, or seat the rubber gasket if that’s what your unit uses, then press it evenly into the drain opening from inside the sink. Once it’s seated, don’t shift it around. Excess putty squeezes out the sides; wipe it off, don’t try to work it back in.
- Work from underneath and stack the mounting hardware in order: fiber gasket first, then the backup flange, then the mounting ring, then the snap ring that locks the whole stack in place against the underside of the flange.
- Tighten the mounting screws evenly, alternating sides as you go. Don’t fully torque one screw and move to the next. Every manufacturer install sheet I’ve read agrees on this one point: uneven tightening racks the flange slightly out of true, and that’s a slow leak waiting to happen months down the road, not today.
- Wire the disposal if it isn’t pre-corded: white wire to white (neutral), black to black (hot), and the green wire to the disposal’s ground screw. Secure every connection with a wire nut, twisted until it’s snug and doesn’t pull free by hand.
- Hang the disposal body. Align the mounting tabs on top of the unit with the mounting ring, then lift it into place. It’s heavier than it looks, so support the full weight with one hand or a jack while you work the mount with the other, don’t hold it one-handed while trying to twist it on. Twist-lock systems: rotate the lower ring until you hear and feel it click into place. Three-bolt systems: hand-tighten all three mounting screws evenly, same alternating pattern as step 3.
The twist-lock and three-bolt systems are genuinely different mechanically, so don’t try to force a twist-lock motion onto a three-bolt unit or vice versa. Check which one you’ve got before you’re standing there holding a 15-pound disposal overhead.
Twist-Lock vs. Three-Bolt: Quick Reference
Twist-Lock (e.g. InSinkErator Quick Lock)
Seals with a rubber gasket, not putty. Removes with a counterclockwise turn of the lower ring. Mounts by rotating the ring until it clicks into place.
Three-Bolt
Seals with plumber's putty or gasket per the install sheet. Removes by backing out all three screws evenly. Mounts by hand-tightening all three screws in the same alternating pattern.
The two systems aren't interchangeable. Confirm which one you've got before you're standing there holding the unit.
The Dishwasher Knockout Plug: The Step Everyone Skips
Every new disposal ships from the factory with a knockout plug sealing off the dishwasher inlet. If a dishwasher connects to this unit, that plug has to come out, and it has to come out before you mount the unit, not after.
Set a flathead screwdriver or a wooden dowel against the inside of the plug from inside the grinding chamber, tap it free with a hammer, then shake the loose piece out through the top opening. It only takes a minute.
Here’s the part that catches people: if you skip this and mount the dishwasher hose to a unit with the plug still in place, the dishwasher will run its cycle completely normally, drain sounds and all, and never move any water out. It backs up instead, usually showing up as standing water at the air gap or overflow onto the counter right at the end of the cycle. It’s the single most commonly missed step I’ve seen in a first-time install, and it’s also the easiest one to fix if you catch it before mounting: five minutes with a screwdriver, done.
If there’s no dishwasher and never will be, leave the plug exactly where it is. It’s doing its job.
Connecting the Drain, the P-Trap, and Testing for Leaks
- Connect the discharge tube to the disposal’s side outlet, using the rubber gasket or coupling that came with the unit.
- Reconnect or reposition the P-trap so it lines up with the new outlet height. The height often shifts slightly between the old unit and the new one. Secure everything with the slip nuts, hand-tight plus a quarter turn with pliers, not cranked down.
- Attach the dishwasher hose, if there is one, with the correct clamp for the hose diameter.
- If a dishwasher’s involved: that connection has to terminate at an air gap or a secured high loop under the counter. That’s an actual plumbing code requirement (International Plumbing Code, or IPC, indirect waste section), and it’s there for a real reason: it stops wastewater from siphoning backward into the dishwasher when the disposal’s running.
- If you’re working with a double-basin sink, the disposal mounts to one side and a drain tee routes the second basin’s line into the shared P-trap below. That’s a real variant worth knowing about, but it’s a plumbing-supply drain kit and a slightly different trap arrangement, not a different disposal install, so I won’t walk through it step by step here.
Once everything’s connected, restore power at the breaker. Run cold water, not hot, through the sink, and cold water only during normal use going forward. Hot water melts fat that’s sitting in the line, and it just re-solidifies further down where you can’t see it. Switch the unit on and check every connection while it’s running: the flange up top, the discharge tube, and the P-trap underneath.
If something’s weeping at a joint, tighten that fitting. If the flange itself is leaking, that’s a seal problem, not a tightness problem, and no amount of extra torque on the mounting screws fixes it. You’ll need to pull it and reseat it.
Installing Where There Was Never a Disposal Before
This is a genuinely different job from a swap, not a longer version of it. There’s no existing switched outlet or dedicated circuit to reconnect to, no disposal-ready flange already in the sink, and the drain itself may need reconfiguring to accept a disposal’s outlet height and angle.
The electrical side is the real gate here. If there’s no existing switched outlet or dedicated circuit under that sink, this is new electrical work, full stop. I’d bring in a licensed electrician for that part, both because it needs to meet code and because miswiring anything in a wet under-sink location is a real shock and fire risk, not a theoretical one. It’s also worth checking with your local building department before you start; a lot of jurisdictions require a permit for new circuit work, even for something as small as one outlet.
Once the electrical side is sorted, out by a licensed electrician or already present, everything else in this post applies exactly the same way: the flange, the mounting stack, the wiring hookup, the dishwasher knockout plug if it’s relevant, and the drain connection. A first-time install just means you’re doing every one of those steps instead of skipping the ones that were already there.
Garbage Disposal Installation FAQ
Can I install a garbage disposal by myself? In most cases, yes. What decides it is whether there’s already a switched outlet or hardwired switch under the sink and whether the new unit’s mounting system lines up with what’s already there. The one thing that pushes it out of DIY range is missing electrical infrastructure, not the mechanical work itself.
Do I need an electrician to install a garbage disposal? Only when the wiring isn’t already there. If there’s an existing outlet or dedicated circuit under the sink, connecting the disposal to it, whether it’s cord-and-plug or hardwired into a junction box, is a normal part of the DIY install. New circuit work is a different matter entirely.
How much would a plumber charge to put in a new garbage disposal? Full professional installation runs about $550 on average, typically somewhere between $150 and $950 depending on the specifics of the job, per Angi’s cost data.
Is it hard to get a garbage disposal installed? A standard replacement is a well-defined job you can knock out in one to two hours with tools most homeowners already own. It only gets genuinely harder when the mounting hardware doesn’t match the old unit or there’s no existing wiring to connect to.
Do I need a permit to install a garbage disposal? Usually not for a straight swap using plumbing and wiring that’s already in place. If the job involves running a new electrical circuit, plenty of local building departments do require a permit for that specific work, so check before you start rather than assume either way.
Does a garbage disposal need to be on its own circuit? A lot of homeowner wiring guides describe disposals, and dishwashers too, as commonly needing their own dedicated branch circuit separate from other kitchen outlets. Local code varies enough on this, and on how the receptacle distance and GFCI rules get measured near a sink, that I’d confirm with your local code rather than treat any single rule as universal.
Can I install a garbage disposal without connecting a dishwasher? Yes, and it’s the simpler version of the job. Just leave the factory knockout plug in the dishwasher inlet exactly where it is. It’s there specifically to keep that opening sealed until a dishwasher is actually connected to it.
When I’d Stop and Call an Electrician or Plumber
The short version, tied back to everything above: if there’s no existing switched outlet or dedicated circuit under the sink, that’s electrician work, not something to wire up on a hunch. If you get into the job and find a corroded trap, a cracked drain line, or plumbing damage that goes beyond the disposal itself, that’s a plumber’s territory, not something to force through with more Teflon tape.
Everything else covered in this post, the flange, the mounting stack, the wiring hookup to existing power, the dishwasher knockout, the drain and P-trap connection, is a real weekend job with tools most people already have in a drawer somewhere.
If your install goes fine today but the unit starts acting up a few weeks or months down the road, humming without spinning, not draining, tripping the breaker, that’s a different situation from an installation problem, and worth troubleshooting what’s wrong first before you assume you did something wrong on install day. You probably didn’t, and that’s the whole point of walking through it step by step first instead of guessing halfway through. If a different fix or a different room turns out to be next on your list, there are more DIY guides on Homerous covering the same kind of ground.